Showing posts with label Sandwiches. Show all posts

Saturday, September 15, 2012

Mash Made In Heaven

Hooray for the weekend!! It's been a lazy-productive day so far. Meaning I have accomplished a lot while still in my PJ's. Knitting, cooking, cleaning, shopping ; ). And blogging of course! What's in store for your saturday??

Yesterday's post of Oven Fried Green Tomata's mentioned the bean burgers I made which were perfect with the FGT. It's also the fricken simpliest recipe for bean burgers eva. Thanks to Kath at Kath Eats Real Food! Out of all the bean burgers I have made, this was the tastiest, easiest burger hands down. They stayed together when cooking, and really only require two ingredients, but added some spices to make things interesting. No brainer!

No Brainer Bean Burgers
serves 4
adapted from Kath Eats Real Food

1 can black beans, rinsed
4 T whole wheat flour
spices to taste (I used cumin, chili powder, garlic powder, and pepper)
1-2 T water

Combine the beans, spices, and flour in a bowl, and mash with a fork until...well mashed!

You can add a couple of tablespoons of water if the mixture is too dry. I ended up adding about a tablespoon to mine.

Heat a skillet to medium-high and spray with cooking spray.

Form bean mixture into 4 patties, and cook in skillet for about 3-4 minutes on each side. They should be nice and crispy on the outside.

The texture is rather creamy, and I'm in love with it! They stay together better than any of the burgers I made with breadcrumbs, or egg. You can also add additional veggies like diced pepper and onion for more flavor or nutrition. Either way I recommend these easy and cheap burgers!

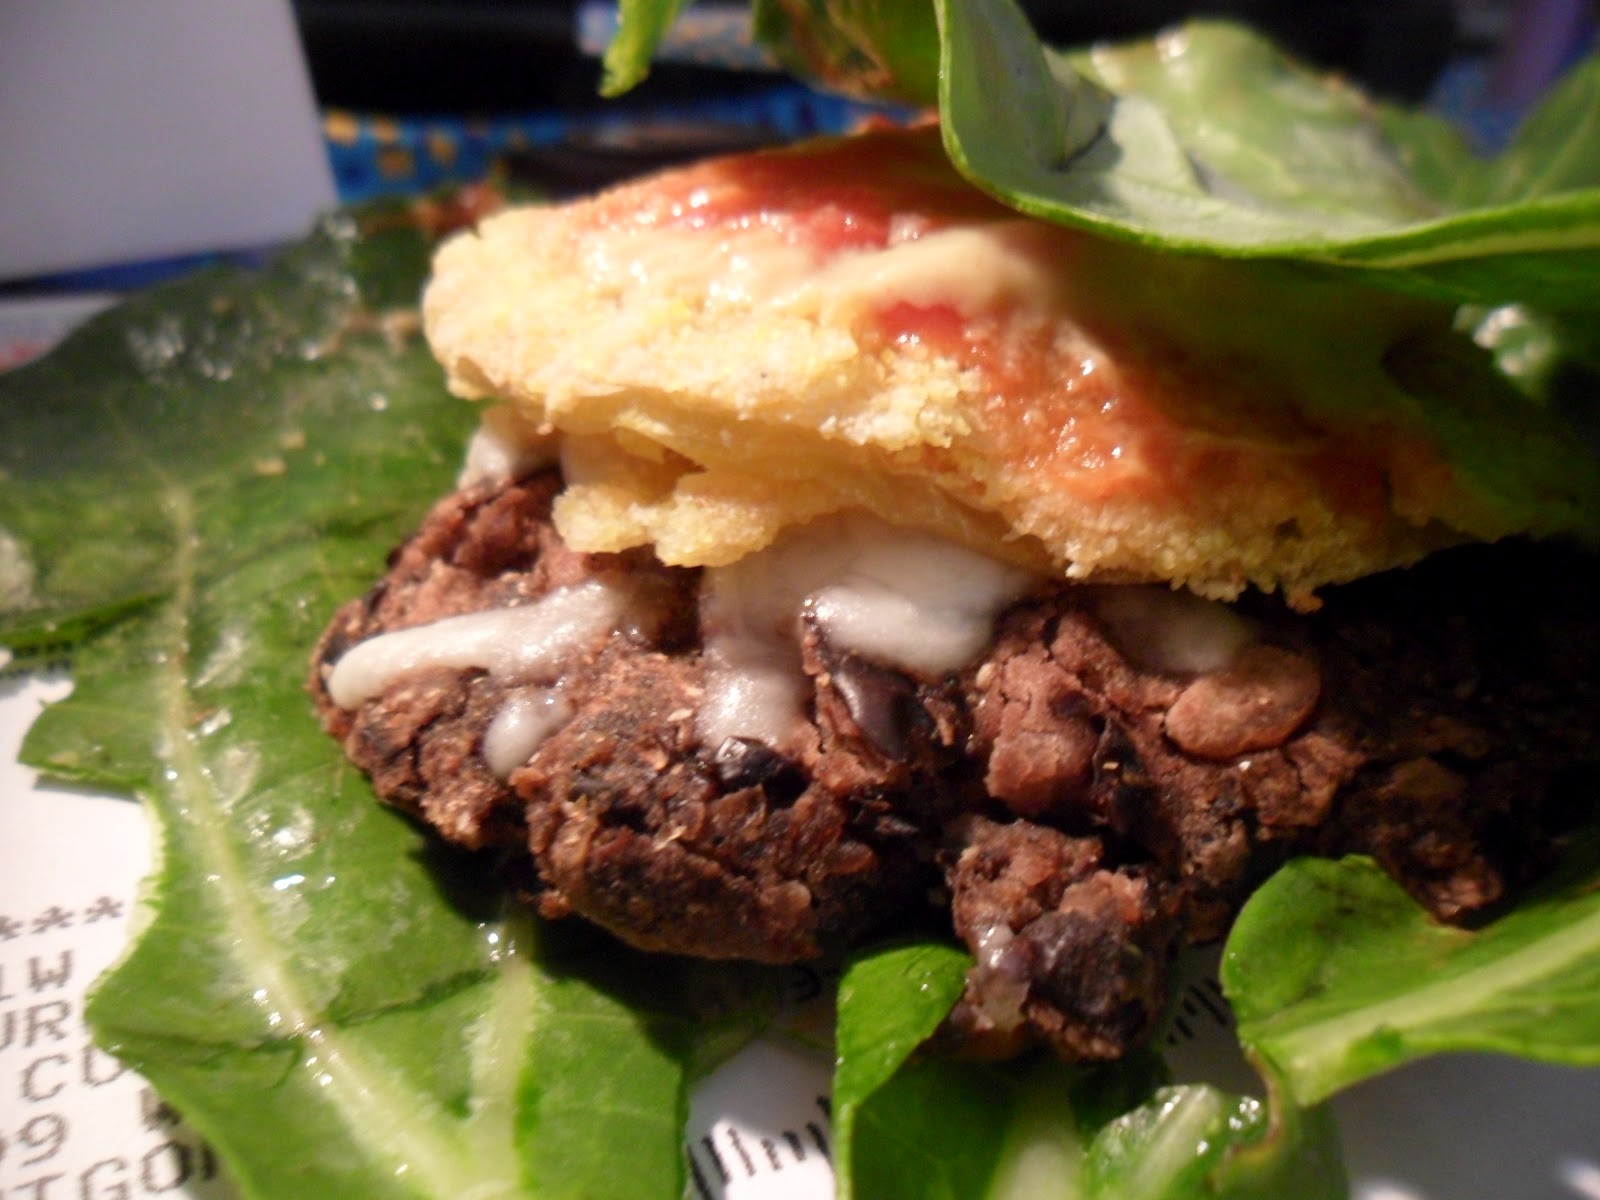
They also freeze well. I cooked mine, and wrapped in plastic wrap, and reheated in the microwave for a minute. And they STILL stayed together. Kudos. Here's my burger topped with some mozzarella, my FGT, and some ketchup all wrapped in a big ol' collard green!


Enjoy the weekend!!

Tuesday, May 15, 2012

Do You Know What They Call a Quarter Pounder With Cheese in France?

A Royale with Cheese! If you've ever seen the movie Pulp Fiction you'll know what I'm talking about here. This next post reminded me of a scene from this movie, with Samuel L. Jackson and John Travolta in "The Big Kahuna Burger" scene. Without going into a whole movie overview, there was a fictional burger joint called The Big Kahuna Burger, a hawaiian burger place. I decided to be adventurous and take my taste buds on a tropical vacation a la veggie burger style. Thus the Hula burger was born! It's not quite a recipe, but an idea of topping a veggie burger with a slice of grilled pineapple and BBQ sauce. The combination of sweet and smoky was a perfect balance, and offered something different than your run of the mill lettuce tomato ketchup topping. Here's what I did...

The Hula Burger
serves 1
1 Veggie burger patty (I use Meredith Farms brand)
1 slice of pineapple (I just used the canned variety)
BBQ sauce
Lettuce
Bread of choice (I used half a whole wheat wrap)


I started by heating a pan over medium-high heat. I would have used the outdoor grill (and suggest doing so!) for the real char-grilled flavor, but ran out of propane, so had to resort to the next best thing. If doing as I did in a pan, I suggest defrosting the patty a bit in the microwave to speed up the cooking process. Just toss it in the microwave for 30 seconds or so, just until it's not frozen. 


Heat the burger in the pan, cooking each side for about 2-3 minutes. When you flip the burger, add the slice of pineapple to the pan. Each side only takes about a minute or so. Once both are char-grilled to perfection, transfer to your bread of choice, and top with a good squirt of your favorite BBQ sauce and some crisp romaine lettuce. 


I served mine alongside a salad and my guilty pleasure of Creamy Parmesan Suddenly Salad, although I did make it healthier by replacing all but 2 T of the mayo with plain non-fat yogurt!


Aloha to the ordinary! Now where's my hula skirt and umbrella drink?!

Tuesday, May 1, 2012

Rainy Daze

*Insert deep sigh here* They are still in the process of setting up the field of chairs for graduation, which is officially less than 4 days away! Our graduating class is the largest to come out of Keene State with 1,171 students, and we have to sit through it. Yay!! On a positive note, the forecast seems to have us on its side with 70 degrees and no rain! No sun either, but I'll take it!

(courtesy of weather.com)

Both of my only finals are this afternoon which has left me plenty of dilly-dally time. I did some work on campus, and returned an old book for a whopping 50 cents! Score a gum ball for me! I also prepared some recipes to last me the rest of the week, and share with all of you. A quick and easy one for lunch was guiltless egg salad for one. It was inspired by a post on Eating Bird Food, except i was out of curry powder so just made a good ol' fashion sandwich to pair with a cup of homemade pea and lentil soup. Perfect for a rainy day such as now!


Egg Salad Sandwich
serves 1

1 hard boiled egg
1 1/2 T plain non-fat yogurt (either regular or greek)
2 tsp relish
1 tsp dijon mustard
salt and pepper to taste

2 slices whole wheat bread, lightly toasted
couple leaves of fresh spinach 

Start by peeling the egg, and mashing in a bowl with a fork. Add the rest of the ingredients and mix well. Serve on your toasted bread and top with spinach, and if you like a bit of heat like me, a dash of cayenne. Dig in!


Not much of a recipe, but just an idea of how to make a healthy spin, on a sandwich that tends to get a bad rep. Eggs are not bad for you! Repeat to yourself until it sticks in. 4 years of nutrition courses tell you that the cholesterol you get from eggs does NOT negatively impact your overall cholesterol, but rather saturated fat does. Yes, eggs do have some saturated fat, but also healthy vitamins and minerals, which make them a satisfying choice. Now don't go crazy and go eating 12 egg omelets every day. The good ol' nutrition mantra is "everything in moderation." The yogurt instead of mayo also cuts back the saturated fat you would get from mayo, but still gives you the creaminess, without the guilt! 

Off to finish my college career now, no biggie.


What's your favorite rainy day activity?


Sunday, March 11, 2012

Sweet Memories.

Well I'm officially on Spring Break. Cancun here I come!! And by Cancun I mean working every single day of break. Lucky me. I'm actually not too upset since it's only from 3-5:30, and I otherwise have no major plans in the making. I did take the opportunity to visit home for a few days, primarily for my Mom's birthday and trying on bridesmaids dresses..or in my case, Maid 'O Honor dress. Now Katie is not your typical bride, so we of course don't have your typical bridesmaids dresses either.

Sherri, Katie, Kelly, and yours truly

Ok totally kidding! Just having/making fun with the array of clearance dresses they had. Mine had a "bat wing" proven by the description on the price tag. We of course picked out the real dresses, but I'll keep you in suspense. After a day of dress fittings, Panera, and a luau (yes a luau in 30 degree weather), I would call it a successful visit home. 

A trip back home also inspired me with another twist on a classic dish, if you can even call it that. My childhood or rather high school years consisted of lots and lots of sandwiches. I can honestly say that I religiously ate PB&J everyday after school for a good year or so. I don't think I have actually had one since! I think I ate enough back in the day to not have a craving for one for another couple of years. To mix it up a bit, I would also have my other obsession of PB& Banana sandwiches. This was culinary genius when I was a kid. I didn't know something so delicious could be made with three ingredients! Of course it consists of a good helping of peanut butter, after all it is me we're talking about. Having grown up a bit (and by a bit I mean nearly none at all), I still love this combo but felt the need to sophisticate the sandwich for my adapted palette. It took a long time to develop, but I think the effort truly paid off. Be sure to take a good chunk out of your day to prepare this, as I'm sure you won't be disappointed.

PBBP (Peanut Butter Banana Pretzel) 'Wich
serves 1
2 slices bread ( I prefer whole wheat)
1 T Peanut Butter 
1/2 medium banana, sliced
2-3 Pretzels
dash cinnamon 
dash honey

PBBP. Say it. Kinda fun, huh? Well it should be, because if you couldn't already tell I'm a bit sarcastic. Just sayin'. But really, this sandwich has so much going for it. Creamy. Sweet. Salty. Crunchy. Warm. Easy. Every kind of goodness in one sandwich. The pretzels really add a salty crunch that my "developed palette" loves.

Simply slather the PB on bith pieces of bread (for maximum stick-age). Top one slice with the banana, pretzels, cinnamon, and honey. Top with the other slice and dig in! I went the extra 2 minutes and heated my sandwich in a skillet over medium-heat for the extra crunchy warm factor. Well worth it in my opinion.

I suggest slipping on some feety pajamas, watching Clarissa Explains It All, and playing Girl Talk while enjoying this sandwich. But that's just me. Enjoy this classically (is that actually a word??) twisted sandwich, as I can assure you I did.
Creamy, Crunchy Goodness.

What was your favorite kind of food as a kid?

Tuesday, October 11, 2011

Ain't Nothin' Awful 'Bout Homemade Falafel.


Reunited finally! I have been lost without my computer for almost 2 months now, thus the absence of a new blog post. My computer is now safe and sound with me again, so I can begin to add more posts! 

This one is from a while ago but again, I was unable to post it, but delicious none the less. Falafel. Let me count the ways I love you. Or just show it by posting the recipe for some yummy homemade ones. If you've never had the pleasure of trying falafel let me enlighten you. It is a fried chickpea patty, often served in a pita pocket with a tahini (sesame seed spread) sauce. While it may not sound "OMG" worthy, one bite would change your mind.

This recipe was adapted from the Picky Eater's Blog, where she posted an easy to follow recipe for baking the falafel instead of frying them. Here's the link if you'd like the original recipe:
Picky Eater's Blog Falafel


Homemade Falafel
Makes 15 Patties


15 oz can chickpeas, rinsed and drained
1 medium red onion, chopped
1/4 cup whole wheat flour
3 T. parsley, chopped
2 cloves garlic, chopped
1 T. cilantro, chopped
1/2 T. ground cumin
1/2 t. salt
1/2 t. baking powder
1 T. lemon juice
1/4 t. paprika
salt and pepper
cooking spray
Pita bread/ pockets
Tzatziki/ Tahini

First, preheat your oven to 375, and spray a baking sheet with cooking spray. Set aside.
Now comes the other easy part. Add all the ingredients except baking powder, pita, and taziki or tahini into a food processor and blend until everything is combined.


Now transfer the mixture to a bowl and  stir in baking powder. You can also taste to see if you need any more seasoning such as salt and pepper. I really love garlic, so I added some garlic powder to mine, and also a little bit of cayenne to in the words of Emeril "kick it up a notch."

Now comes the fun part! Take a spoonful of the mixture and roll into a ball in your hands. If you're afraid of getting dirty...then you shouldn't be cooking in the first place. It's really not that messy of a job, and you get the job of smelling like garlic and cilantro for the rest of the day! I managed to get about 15 patties when I made my recipe, but feel free to make them smaller or bigger to your liking. Just keep an eye on them when baking since the time it takes them to cook will be different than the one I provided.
Place the patties on the prepared baking sheet , and flatten slightly, then give them a generous spray with the cooking spray, and pop them in the oven for about 15 minutes.
Once they've been in the oven for 15 minutes, take them out and give them a flip. We want to equally share the golden brown crispness to both sides. Pop them back in the oven for another 10-15 minutes.

In the meantime, you can prepare the fixins' for a nice falafel pita! While traditionally falafel is served with a tahini sauce, I did not have any on hand, but instead had a greek yogurt dip called tzatziki (ta-zee-kee). It's a cucumber and spinach dip, that went pretty well with the falafel. Feel free to swap out for tahini or even just eat em' plain.

I did end up making my own pita pockets, but they were far from being "pockets" and more like flattened frisbees, so I didn't end up posting them. I'll give them another try, and if successful I will share my glory. For the meantime you can just buy some pita pockets already made. I also added some chopped tomato and romaine lettuce to my pita pocket along with the tzatziki to await the arrival of some piping hot falafel. Once they look golden on the top you can take them out of the oven and enjoy! They reheat pretty well, so you can enjoy them over and over again.

Hope you enjoy this simply delicious recipe as much as I do!

Monday, January 10, 2011

To Meat or Not to Meat?: Either Way Delicious!

Alright, so this is by far one of my favorite recipes. It is simply delicious, and happens to be nutritious. Love when that happens. It's a play on a classic favorite of a steak and cheese sub, but made vegetarian. I can't say that it tastes like a steak and cheese, but has the same meaty, cheesy, pepper & onion-y feel. So hence the name of the "Fake & Cheese." It is simple, healthy, and of course delicious. Vegetarian and Meat Eaters alike should give it a try!

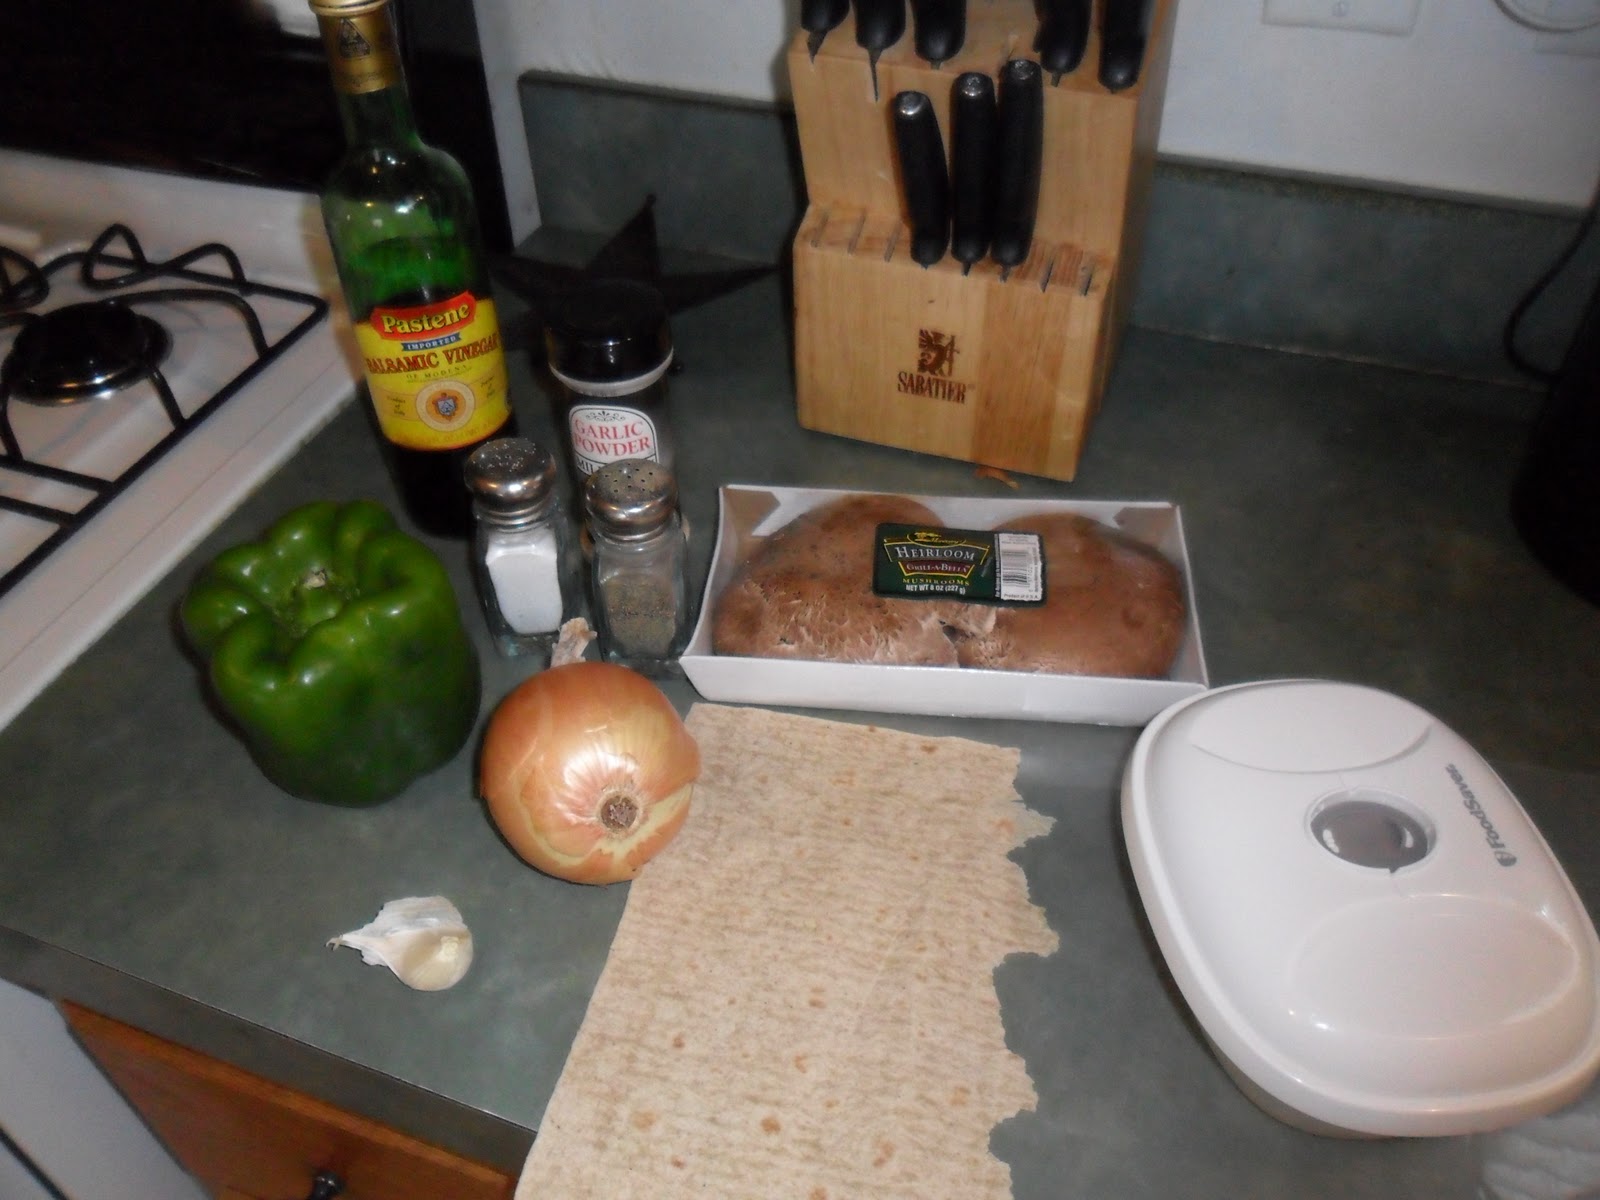
Ok, so when I made this recipe I was making it for one, but turned out that it made enough for two (or leftovers!) So if your making it for one person I would still stick to the amounts shown, but feel free to adjust it according to how many people you want to serve. So what you will need for your "Fake & Cheese" is:

  • 1 Portabella mushroom, cleaned and stem removed, sliced
  • 1 clove garlic, minced
  • 1/2 green bell pepper, sliced into half strips
  • 1/2 yellow onion, sliced
  • 1/3 cup balsamic vinegar
  • Bread of your choosing
  • Cheese of your choosing (provolone is delish!)
  • Salt & Pepper, to taste
  • Garlic Powder, to taste
  • Tupperware container (or anything to marinate in)


So the first thing you want to do is to clean the mushroom. Remove the stem since the tend to be a little tough. Then use a damp paper towel to wipe off the mushroom, not running water, since it tends to make them rubbery and not delicious. Then just slice it into strips. I like bigger strips to make it "meaty-er".

Next, mince the garlic, and add both to the tupperware container. Add the balsamic vinegar, salt, pepper, and garlic powder. It sounds like a lot of garlic, but I promise it won't overpower. If your less of a garlic fan, you can omit one of them or even both. Cover the container, and give it a good shake to coat the mushroom. Then, I let it marinate for at least a couple hours, but whatever time you have will suit just fine.
When you're ready to start cooking, you can chop up the peppers and onions. I just make both into slices, and cut the peppers in half so the strips aren't too long. Heat a skillet to about medium heat, and when warm, add about a teaspoon of cooking oil. Add the peppers and onions.
Cook them until they are tender, but still have a little bite to them. (About 10 minutes). Now the trick I use to sautéing is to start with a small amount of oil, and when it starts to dry out, I add a little bit of water instead of more oil. This helps the veggies cook, but doesn't add any more fat. Add about a tablespoon or so every time they start to look a little dry so they don't burn.
              When the veggies are tender, you can add the mushroom, and the marinade. The vinegar will start to evaporate ( as pictured below. Don't worry, that's not smoke!) I usually turn the heat down to medium-low just to allow a longer cooking, and evaporate most of the vinegar off. This takes probably another 5-8 minutes. Depends how cooked down you like your veggies.

When the veggies and mushroom are cooked down, and most of the vinegar has cooked off, you want to get your bread ready for the dismount. I used a wrap, because that's what I had on hand. They're not the best because they tend to fall apart from all the juices. If you want the real experience, I suggest using a grinder roll, or something along those lines. But use any bread vessel you would like. Then simply add the veggie mixture to your roll, and add the cheese. I used feta cheese, because again that's what I had on hand, but provolone is by far my favorite! I usually use half a slice just broken up into pieces so I use less, but every bite has cheese on it. Voila! You just made a Fake & Cheese! I added a salad to the plate since it looked a little lonely, and it added more veggies!
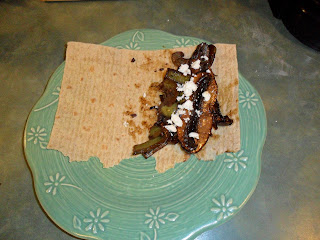
I love the flavor combo of balsamic, peppers, onions, and mushrooms. Another good pair is with goat cheese. Probably one of my favorite flavor combos. As I always say, experiment! These are my ideas, but I always encourage different ideas, and want you to share!

Now the nutritional changes of the original steak and cheese and this recipe is pretty much the replacement of meat. The recipe pictured has around 190 calories per serving. While a regular steak and cheese can have from 300-600 calories, roughly. So in the meat alone 2 oz of steak has about 100 calories and 7 grams of fat. 2 oz of portabella mushroom has about 30 calories, and trace amount of fat. The amount of cheese you put on the sub will affect the calorie and fat content, so try using less, and find a happy medium where you don't feel deprived. Hope you enjoy!