Showing posts with label whole wheat. Show all posts

Friday, March 30, 2012

Weekend of my life

So this Sunday may or may not be the determination day for at least the next year of my life. Actually it definitely is. That is the day I find out dietetic internship placement, which if my intuition and hard work are right, will be in Montgomery, AL. Bring on the anxiety and Sweet Tea.

The past few days have been a bit dreary and combined with some stress relief brings me to crank up the oven and bake. Now you would think the common baked goods would be coming out of my oven: Banana Bread, Chocolate Chip Cookies, Cupcakes. But of course not! That would make sense, which is of course not me. Instead, I baked up one of the easiest, and tastiest recipes from the vegan blog Oh She Glows, which happens to be one of my favorite food blogs around. Although I'm not vegan, she has a lot of delicious recipes that I may have not thought otherwise to even try. Enter, homemade wheat thins. You read it right, wheat thins, made by you. I would have never thought of attempting these, but when I saw how few ingredients, and simple the process was, I gave it a try and am so glad I did! I suggest you do the same, before you buy a box of who-knows-what crackers, bake some up yourself on a rainy and otherwise uneventful day. You won't be disappointed. Besides, these ones are 100% whole wheat with minimal sugar so a snack you can feel good about. I adapted the original recipe to make a rosemary and garlic variety, which are SO good! Love the combo, and make a perfect vehicle for some creamy hummus!


Rosemary & Garlic Homemade Wheat Thins
makes about 70 crackers
adapted from Oh She Glows


1 1/4 cup Whole Wheat Flour
1 T sugar (or sweetener of your choice)
1/2 tsp salt
1/4 tsp paprika
1 tsp garlic powder
1 tsp ground rosemary (i just crushed dried rosemary leaves with my rolling pin)
3 T vegetable oil spread (I used earth balance butter, but I also like smart balance)
1/4-1/2 cup water ( I ended up using 1/2 cup water, but it will depend on how dry your dough is)
1/4 tsp vanilla

Start by preheating your oven to 400 degrees, and spraying 2 baking sheets with non-stick spray or lining with parchment paper. Next, sift or whisk together the flour, sugar, salt, and spices. Next, cut the butter into the flour either using a pastry cutter, two forks, or what I did and use a whisk. I cut the butter in by using a twisting motion with the bottom of the whisk, which seemed to work just fine. Whatever method you're comfortable with.

Next, add the water and vanilla. Start with 1/4 cup of water at first, and adjust if your dough is still dry. Stir in the water until a dough starts to form, then finish incorporating with your hands. I really squeeze the dough in order to make sure its thoroughly combined. This is when you will know to add more water or not. 

Now cut the dough in half, or in quarters which I had to do since I have little counter space to work with. Flour a rolling pin and your counter liberally, and roll out the dough as thin as you can. This takes some muscle, but the thinner, the crispier and better your crackers will be. Now cut the dough into the familiar wheat thin shape, or what ever you would like. I tried to make them resemble the original as much as I could, but a few are a bit "rustic". It doesn't really matter in the long run, they will all taste the same. Just a matter of how picky you are about appearance.


Now transfer to the baking sheet, spray with a bit of cooking spray and sprinkle with some more salt and garlic powder. Bake for about 8 minutes, but keep a close eye on them since they burn easily. Repeat until your dough is used up, (which was two batches for me) and you are left with fresh from the oven whole wheat crispy deliciousness!


Store them in an air-tight container for around 2-3 weeks, if they last that long! Experiment with different flavors, I would love some new ideas! As always enjoy and let me know what you think.


What's your favor thing to dip wheat thins in??

Thursday, March 1, 2012

March Madness.

Ahhh. The first day of March. A sign of Spring to come! Oh wait, I forgot. I live in New England, sooo I woke up to this


The good news is no school or work, so plenty o' time for blogging! Aside from making lunch and today's blog posts, I have actively sat on my ass thus far. A Jillian Michaels dvd sesh is anticipated later on today, so I don't feel too bad.

I am constantly trying to make my own bread, with results far from satisfactory. I am making improvements, but my earlier attempts resembled doorstops and french toast sticks. Haha my bread did not rise above 2 inches, so the slices were more "stick" like. My last attempt was much better, but still not as risen as I anticipated. My next attempt will include the use of whey, which is the liquid part you see in yogurt before you mix it in. I heard that helps with bread baking, and if it comes out well you will hear it! One recipe that has proven to be successful and painfully easy is for whole wheat tortillas. I used to omit the oil, but found that the oil makes the tortillas much more flexible and chewier, as compared to stiff and leathery. Apart from being entirely whole wheat, these contain no trans fat, and only 67 calories each! A lot of commercial tortillas contain lard, or partially hydrogenated fats both which are not healthy choices. This recipe is a lot easier if you have a food processor and a rolling pin, but can be made without.


Whole Wheat Tortillas
Makes about 16
2 cups Whole Wheat flour
1/2 tsp salt
1/2 tsp baking powder
1/2 - 3/4 cup warm water
*Gallon size ziploc needed as well


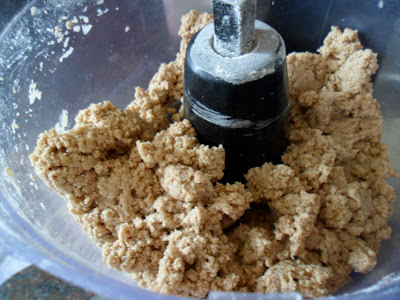
Start by adding the flour, salt, and baking powder to your food processor and give it a few pulses to mix it all together. You can do this with a bowl and a whisk if you don't have a food processor, but much easier and less messy with the FP.


While the machine is running, stream in the warm water until it starts to form a dough. You may have to use a bit more or less water depending on how dry your flour is. I used a bit more than half a cup this time. You want it to be moist but not sticky. Trial and error is the best measurement I can give you.


Now turn out to a lightly floured surface, and knead in a ball about 15 times. I used a large cutting board since it is easier to clean up than a messy countertop. Learned from experience. After kneading, cut the dough into 16 pieces. The easiest way I found to do that is to first cut the dough in half. Next, cut each half in half. Then cut each of those halves in half. It sounds a lot more complicated than it is, but overall, cut the dough in half, and cut each half in to 8 equal pieces.(* I recently got a kitchen scale and weighed each ball to about an 1 oz. each. If you have a scale, weigh the dough ball, then divide the total ounces by 16 to get how much each should weigh). Roll the pieces into a ball, and place on a plate or bowl and cover with a damp towel. Let them take a cat nap for about 15 minutes. While I was waiting I made homemade ketchup! The recipe will soon follow.


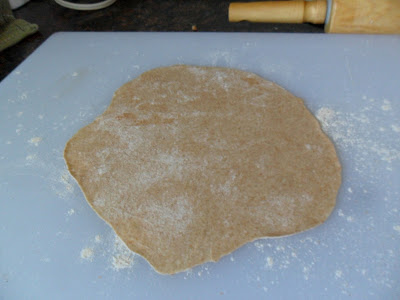
Now comes the work. Start by heating a skillet over medium heat. Cut the sides of your ziploc bag so that you can unfold the bag entirely. Lightly spray each side with cooking spray, lay one ball on one side, cover with the other side of the bag, and roll out with rolling pin. This is such a better process than the orginal! No mess, softer tortillas (since less flour is used) and they come right off the bag! Just remember to spray after each tortilla! Sorry I don't have any updated photos, but here is the process I used, which is the same I do for corn tortillas


Now add one to the heated skillet. Don't worry! No oil is needed in the pan. This would result in soggy or burnt tortillas. No good! An important note is that once it's in the pan, it's hard to maneuver it at all, so try your hardest to lay it as flat as possible. Cook it on the first side for about a 30 seconds, or until it starts to brown lightly. Flip, and cook for an additional 30 seconds. Transfer to a plate until cool. While one's in the pan, roll out another one so it's ready to go. Once you get in the rhythm of it, it gets pretty easy.


Sorry for the lack of quality pictures, but my camera was in one of it's moods again. Once all your tortillas are cooked up, I cool them on a plate and store them in the freezer. 20 seconds in the microwave and they are good as fresh! These are perfect for tacos, wrap sandwiches, or mexican lasagna! I'll have to post that recipe as well. So good! I've also heard of putting seasoning in such as garlic powder, cayenne pepper, or chili powder, but prefer to keep them plain so they can be used for any recipe.

As always enjoy, and let me know what creative ideas you have!

What's your favorite thing to do on a snow day?

Tuesday, May 24, 2011

Pizza Perfection.


In the words of my Mother, "this is seriously, the best pizza I've ever eaten." With that being said, homemade pizza is more work, but also more delicious than your average take out pie. It's not the actual hands on work that's the killer, but rather the wait. It takes at least 2 1/2 hours from start to finish, but most of the time is dedicated to letting the dough rise. I got the recipe for the dough from allrecipes.com, (http://allrecipes.com/Recipe/amazing-whole-wheat-pizza-crust/Detail.aspx), but made a couple slight changes. As far as toppings go, I would go with what you have in the fridge which is what I did. As long as you have some veggies, cheese, and sauce, you can top a pizza.

Here is what you will need in order to make the dough. It's uses whole wheat flour as well as all purpose, so it is also a bit healthier than its' take out  counterparts. It also is enough dough to make two pizzas, unless you like a REALLY thick crust. I made 2 pizzas, and the crusts were still pretty thick.


Homemade Whole Wheat Pizza Dough:
1 teaspoon honey
1 1/2 cups warm water
1 Tablespoon active dry yeast
I Tablespoon Canola Oil
1 teaspoon salt
2 cups Whole-Wheat Flour
1 cup All-Purpose Flour

Equipment:
2 Large Bowls
Measuring Cups
Measuring Spoons
Dish Towel


First you want to add the water and the honey to one of the bowls. I used honey instead of white sugar, since I try to use as little refined sugar as I can, but that's my preference. Whatever sweetener you have/use will be fine. Stir to dissolve the honey. Then sprinkle the yeast into the water, and let sit for 10 minutes, until it turns foamy. If it doesn't foam, you're yeast is dead. :(


While the yeast is activating, I got the next set of ingredients together. I mixed the salt and oil together in a small bowl and set it aside.
Next, I measured out both of the flours, and set them aside. I use a flexible cutting board for the flour, so when you scrape off the excess flour from the top of the cup, it is easier to just bend the cutting board, and pour the flour back in the bag.
I also took the other bowl, and sprayed it with non-stick cooking spray. If you don't have any spray, brushing the bowl with oil will works as well.

Once the yeast is activated, add the oil mixture and stir. Then add the flours and stir until a dough starts to form. The dough will still be sticky, but don't worry we'll fix that in the next step.

Once you have a dough formed, turn it out onto a generously floured surface. This is when it starts to get messy. Be warned that the majority of your kitchen will be covered in flour when you're finished. But it's so worth it!
You now want to flour your hands as knead the dough, making sure all the flour gets incorporated. Continue knead for about 10 minutes, until the dough is smooth. Don't be afraid to add more flour to your board, and your hands to prevent the dough from sticking. Sorry there's no picture for this part, it was a bit messy, but here is what your dough should look like after all the kneading. If you have a stand mixer, feel free to use it instead of kneading. It should take the same amount of time, I just like to get a little arm work in. And I feel more accomplished knowing I put all the effort in.
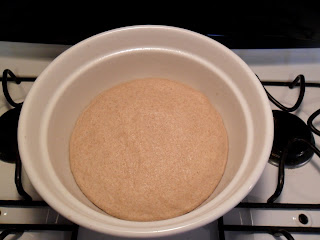
Now put the dough into your greased bowl, and cover with a damp towel to prevent it from drying out. Put it in a warm spot for about an hour, until the dough has doubled in size. Now if your house is rather chilly, I have preheated my oven to the lowest setting for about 5 minutes then shut it off, and let my dough rise in there. Just make sure its not too hot, or else it will kill the yeast, so only preheat for a few minutes on the lowest setting.
If you have some chores to do around the house/yard, now is the time to do it. Believe me, if you're not occupied you will be tempted to keep peeking at the dough to see if it has changed yet, and that hour goes by SLOWLY.
Once your dough has doubled in size, cut it in half, and roll the two halves into balls. It's time to repeat the waiting game. Add the dough back to your bowl, cover, and let rise for another 45 minutes. This is why it takes so long! But remember, it's worth it!
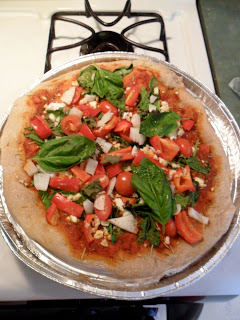
In the last twenty minutes of the rise, I start to prep the toppings for my pizza. I didn't take a picture of this part, but again use whatever you have on hand, or that you want on your pizza. Like I always say, be creative! If you need some inspiration, my toppings consisted of :

-leftover pasta sauce
-crumbled feta & goat cheese
-minced garlic
-spinach
-sliced cherry tomatoes
-chopped red pepper
-chopped onion
-fresh basil leaves

You can also preheat your oven to 425 at this point. I had some disposable pizza pans on hand, but any baking sheet will work. Just spray them with cooking spray, or brush with oil.

Once your dough has doubled again, take one ball of dough, and roll it out on a floured surface. Then put it on your baking sheet, and stretch to fit. Repeat for the second ball of dough.

Add your toppings, and bake for 16-20 minutes, or until the cheese has melted, and crust is browned.


Voila! You have just made your own Pizza! Give yourself a pat on the back, but not before you dive into your perfect pie. You deserve a slice straight from the oven for all that work.

I hope you enjoy the process of making your own pizza dough. A lot of the store bought doughs contain trans fat, so making your own is always healthier. If you have the time to do so, I suggest making it from scratch. It also allows you to control what to put on, and can be much cheaper than take-out. Just like many other of your ( and mostly my) favorite indulgences can be sinfully nutritious!