Showing posts with label Dinner. Show all posts

Monday, April 9, 2012

Easter Eats

Monday, Monday, let me count the ways I loathe you... I can never decide if Sunday or Monday is worse. Sunday-anticipating monday OR Monday- When your alarm seems to go off WAY too early with a bajillion things waiting for you to do. Either way, here we are back to the grind.

I had a wonderfully (way too short) Easter yesterday. Wish that I had an extra day off, but it is nearing a close and I have survived yet again. My aunt hosted a lovely dinner with so many great dishes. The spread included lambchops, ham, cauliflower au gratin, orzo salad, sauteed green beans & broccoli, peas & mushrooms, and my dish of a quinoa salad. I found the recipe on The Kitchn, and originally was recipe for Passover, but has now made it's way to Easter! It was slightly sweet, and had lots of great textures. The colors and flavors could also be good for Thanksgiving, and was a delightfully delicious, nutritious side dish. You could even make this an entree, since quinoa is full of protein and fiber. I would just add some more veggies, and either meat or some beans for extra "fill" factor.


Easter Quinoa Salad
serves 8 as a side
adapted from The Kitchn


1 cup quinoa, uncooked
1 medium sweet potato, peeled and cubed
1 1/2 T olive oil
1/2 cup sliced almonds
3 T apple cider vinegar
2 teaspoons honey
1/4 tsp salt
1/4 tsp pepper
heaping 1/2 tsp ground cumin
heaping 1/2 tsp ground cinnamon
1/2 cup dried cranberries
3 green onions, chopped


Start by adding 2 cups of water and quinoa to a medium pan and bring to a boil. Reduce to a simmer for 15 minutes, or until all the water is absorbed. Let it sit covered for at least 1 hour.


In the meantime, preheat your oven to 400 degrees. Add the cubed sweet potato to a sheet pan and drizzle lightly with oil. I just used cooking spray since I ran out of oil, and it worked just fine. Roast in the oven for about 25 minutes, or until the sweet potato is fork tender.

While the sweet potato is in the oven, toast the almonds in a dry pan over medium heat for about 3 minutes. Toss them occasionally so they don't burn. You can tell when they are done when they are slightly browned and you begin to smell them. Or do as I do and give them a taste!


Next, comes the dressing. Combine the oil, honey, vinegar, salt, pepper, cumin, and cinnamon in a small bowl. Whisk to combine and set aside. Chop the green onion, and set aside as well.


When the sweet potato is done, add it as well as the quinoa, dressing, almonds, cranberries, and half the green onions in a large bowl. Stir until everything is combined. Garnish with the remaining green onions and serve.


I really enjoyed this recipe as well as many of the guests at the party. I will definitely make it again. If you can;t find quinoa in your grocery store, couscous, brown rice, or orzo would also work.


What did you have for Easter?


Tuesday, March 27, 2012

American Classic: Where's the Beef?!

Good Morning to all! The sun is shining, partially blinding me on this chilly Spring day. I'll take chilly and sunny over cloudy and snowy ANYDAY. It's probably a good thing it's been on the chilly side, since the heat wave temperatures seem to melt away any motivation to do anything productive in regards to school. So I'll take it as a blessing (though I wouldn't turn down a little 70 degree, not a cloud in the sky kinda day ; ) )

Now on to the "meat" of my post, but as the title implies, there's no actual meat. Having been a vegetarian for 5 years now, I've tried most every kind of meatless burger out there. Garden. Boca, Char-grilled. Black Bean. You name it, I've tried it. Now I have settled on a favorite brand, which also happens to be the cheapest at my grocery store. They're from Meredith Farms and offer selections from Garden Vegetable, Portabella, or Char-Grilled. I most often go for the Portabella, just for personal taste. Craving french fries last night, I decided to do a spin on the American Classic of a burger and fries. If you've never baked your own french fries, I STRONGLY suggest doing so. I'm addicted. Of course nothing tops a plate of fresh-out-of-the-fryer, salty plate of fries, these actually don't fall far. They're crispy, salty, and (drumroll please!) healthy! Potatoes are in fact healthy despite the bad rep from it's deep-fried counterparts. They're full of vitamins, minerals, and since I leave the skins on a bit of fiber. They regularly take about 40 minutes to bake to their golden deliciousness, but being ravenously hungry, I par-baked mine in the microwave this time around. Being too impatient to wait any longer, I said screw it, and took them out earlier than I should have, which you may notice in the picture. Regardless, the recipe to follow will guide you to golden baked perfection. There's a lot of ingredients so pay attention. (again, it's hard to pick up sarcasm when typing.)

Oven-Baked French Fries
serves 1, but easily expanded for more


1 potato ( I used an All-Purpose, but White Potatoes work well)
1 tsp oil
salt
seasoning (old bay, cajun, garlic powder, etc)

Start by preheating your oven to 400 degrees. If you want the short-cut preparation, which takes about 20 minutes instead of 40, wash and poke your potato, and microwave for about 2-3 minutes depending on it's size. If you are already baking something, it's appropriate to skip that part and follow the regular prep. Next, slice your potato into wedges. I do this by chopping off all four sides so that the potato resembles a rectangle, and slicing into thin wedges, but slice how ever you want. Put wedges on a baking sheet and drizzle with the oil. Next, sprinkle with salt and any other seasonings you like. I used old bay this time around which was rather tasty. Now toss to coat, making sure every wedge has a good dose of oil and seasoning.
Cruddy Photo due to lighting and a grumbling stomach. You get the point though.

Now bake in the oven for about 8 minutes if taking the shortcut, or 15-20 for the regular prep. Remove from the oven, and give them a good stir. Rotate the baking sheet and toss them bake in for another 10-15 minutes until golden and crispy. Enjoy pipin' hot with a side of ketchup. 

Another cruddy photo. Thank you camera!
I served my fries alongside my burger topped with homemade ketchup, mustard, and romaine on some homemade wheat bread. Both recipes are soon to follow, if only I can perfect them! I hope you give these a try, since they are so simple and delicious, and a fair trade from deep frying. I may be assuming, but I think the oven is more often found in the average kitchen than a deep fryer. Unless your name's Paula Deen.


What's your favorite dipping sauce for fries?

Sunday, February 19, 2012

Sweet Home Alabama.

Cue Lynyrd Skynyrd! My day consisted of finishing my application video for my dietetic internship to the Alabama State Department of Education. From setting up, memorizing, filming, and editing, I can see all of what goes into making a video that's just 3 minutes long! Not that I've spent the last few hours sitting in front of this computer screen or anything, but felt what's another half an hour! And thus this blog child.

After making Oh She Glows' Crispy Breaded Tofu Strips, which took me back to my chicken nugget days, I've been inspired to try new tofu recipes. I adapted this recipe for my own version of parmesan crusted tofu! Yum! Add some angel hair, marinara, and a slab of mozzarella and you'd think you were having a chicken parm dinner. Not having marinara OR mozzarella, I opted for a bed of kale and a herb salad. A nice dinner regardless.


Parmesan Crusted Tofu
serves 3


1 package firm tofu, drained and pressed
1/4 cup milk
1/4 breadcrumbs
3 T grated parmesan cheese
1 1/2 tsp italian seasoning


First you want to start by pressing your tofu. I once never bothered to actually do this step in recipes, but after ACTUALLY doing it, I noticed why. The texture, and ability to pick up flavors is much better when you press it. Just drain your package of tofu, remove and wrap in a kitchen towel. Place a heavy book on top, and let it press for at least 20 minutes. I found another great use for my nutrition books!

While your tofu gets a good pressin', you can set up the dredging station. Pour the milk in a shallow dish. Combing the breadcrumbs, italian seasoning, and parmesan cheese in another shallow dish. If you have whole wheat breadcrumbs even better! Or if you have seasoned breadcrumbs you can omit the italian seasoning.

These colors remind me of Easter! With the weather we've been having, it feels like Easter is right around the corner anyway.
Next, preheat your oven to 400 degrees, and spray a baking sheet with non-stick spray.Once your tofu is pressed, slice it lengthwise into 6-8 pieces. I opted for 6, since my tofu wasn't as firm since I bought a new brand. Won't do that again! Then let the dredging begin! Dip each slice into the milk, then fully cover in the breadcrumb mixture. Transfer to your baking sheet.


I'm surprised at how much better these pictures came out compared to my usual. My camera has a mind of it's own, and decides when it wants to take good pictures. Other than that I usually get blurry out of focus crap. I guess I'll just look on the bright side at the way these pictures came out.

Now, bake these breaded slices o' heaven for about 20-30 minutes, until they are golden brown and crispy. F.Y.I your kitchen will smell delicious in the process.

These are good substitutes for chicken if you're trying to limit your meat intake. Serve just like you would chicken. I personally think slathered in a bath of marinara with some crusty bread sounds about right.

Any other ideas?

Thursday, February 16, 2012

A Twist on Tradition

Another mild winter day outside today, which eventually turned into a rainy evening. Rain? In February? Thank you global climate change. If this isn't proof enough, apart from the globe spontaneously combusting, I'm not sure what other signs we need to show that this isn't a hoax. Annnyway, the point I was getting at is that the winter months always put me in the mood for "comfy" recipes. The kind of food that wraps your taste buds and emotions in a warm fuzzy blanket of memories. Mashed potatoes, mac & cheese, we all have our favorites. One of mine growing up was shepherd's pie. Such a simple, humble dish that I would take over any five star restaurant's "i'll give you one flake of salmon, draw on the plate with some sauce and charge you $30" kind of meals. Since becoming vegetarian, ground beef isn't in my food radar anytime soon, but I still crave that comforting dish that mum used to make.

My adaptation of this classic dish, includes making mashed cauliflower instead of mashed potatoes. If you've never had mashed cauliflower you are missing out! It's the same process as their tater counterparts, but have a nutritional boost in comparison. I also used a bean mixture (which I would double) in place of the ground beef. This is a great recipe for a meatless dinner that still has the easy prep, and comfort factor as the original.

Veggie Packed Meatless Shepherd's Pie
Serves 4


1 medium head cauliflower, roughly chopped
2 clove garlic, minced
1 medium onion, chopped
1/2 teaspoon oil
1/4 cup milk
1 teaspoon margarine (such as olivio, one without partially hydrogenated oil")
1 can red kidney beans, rinsed and drained
1 1/2 teaspoons worcestershire sauce
1 teaspoon thyme
1 teaspoon garlic powder
salt and pepper to taste
1 & 1/2 cups frozen mixed vegetables, thawed


First off, you want to make your mashed cauliflower. Start by roughly chopping it, then steam. I used the stovetop with some water in a saucepan and a steam basket, but you can stick it in the microwave in a casserole dish with some water for the same effect. I steamed it about 10-15 minutes, whenever it feels pretty tender. Once it is done cooking, add it to a food processor along with the milk, margarine, garlic powder, and salt and pepper. I also added some of the water I cooked it in for a smoother consistency. Give it a few pulses, scraping down the bowl and repeating until it looks fairly smooth. Now it won't be as smooth as mashed potatoes, so don't expect that. Give it a taste, and season to your liking. Transfer to a bowl and set it aside (if you can keep from eating it!)
Steamin' Away!
 Loading up the garlic powder.

Voila!
Once your smashers are done, preheat your oven to 400 degrees and spray a small casserole dish with non-stick spray. Then, heat the oil in a skillet over medium heat. Add the onion and garlic, and cook until tender. In the meantime, you can make your "meat". This was totally an experiment, but I liked the outcome! Take half of the beans and add them to your food processor (cauliflower removed!) Add a couple tablespoons of water, and a dash of worcestershire sauce. Process until it makes a relatively smooth mixture, but still some texture. Like i said, I only used a small can of beans, but I would double the amount next time.


Once your onions are softened, add the other half of the beans that you didn't mix, along with the worcestershire sauce, thyme, salt, pepper, and about a 1/4 cup of water. Bring the mixture to a boil, and then add the pureed beans. Cook the mixture for another 5 minutes, or until it starts to thicken a bit. I added a bit too much water, so I added a pinch of flour to the mix to thicken it.


Now comes assembly! Start by putting the bean mixture into your casserole dish, followed by the mixed veggies, then finally the mashed cauliflower. Smooth over so it covers all the veggies! Top with a generous sprinkle of salt and pepper, then bake for 25 minutes.
Ready for the oven!

Ready for my belly!

What's your favorite type of comfort food?

Monday, January 2, 2012

Another Year. Another Meal.

So this is the new year. A time for failed resolutions and gym membership profits. Okay, enough humble pie since I myself failed to maintain my posts as I wanted to. It has was quite the busy year, with little time to make a meal, forget about blogging about it. This winter break, although cut short due to work has left the opportunity to kick start the blogging again for this year.

This recipe is quick and simple, but full of flavor. Not eating any red meat or chicken leaves the opportunity to get creative with my meals. I do eat fish, which is often referred to as a "pescatarian" if you were curious, which leads to this post for Baked Haddock with a simply delicious herbed yogurt dressing. This recipe serves two, but feel free to adjust to how many you wish to serve.


Baked Haddock with Herbed Yogurt Dressing
Serves 2


2 - 4 oz Haddock filets (or any other white fish)
2 T skim milk
3 T Whole Wheat seasoned breadcrumbs (regular would work, or also panko)


Dressing:
2 T plain, nonfat yogurt
1.5 tsp red wine vinegar
1 clove garlic, finely minced
1 tsp dijon mustard 
1/2 tsp herbes de provence
pinch of salt and pepper


Start by spraying a glass baking dish or baking pan with non-stick spray, and preheating the oven to 400 degrees.

Next, you'll want to set up your dredging station. Pour milk into a shallow dish big enough to fit your haddock filets into. Next, pour breadcrumbs onto a large plate.

 Dip both sides of the fish into the milk.


 Then coat both sides in the breadcrumbs. 


Transfer to your baking dish, and bake the fish for about 15-20 minutes, or until it flakes with a fork.


While the fish is baking, you can make the dressing. I didn't put up any pictures of the process since all you do is combine everything in a small bowl.If you don't have or can't find herbes de provence, you can simply replace it with a new herb mixture. I would try a pinch of dried basil, thyme, and tarragon. Tarragon isn't a typical ingredient in herbes de provence, but I think it would be rather tasty. I used a large clove of garlic in mine, since I'm a fan of garlic, but if your not, adjust to your liking. I did take the extra time to transfer it to a cute serving dish to take it's picture. You're welcome!

The finished dressing! So creamy and flavorful. Did I mention easy? Winning combo!

Once the fish is done, transfer to your plate and pour half the dressing over each filet. I served mine on a bed of steamed green beans with a baked sweet potato on the side. B-e-a-utiful! I could have used a bit more crunch on the fish, so I may try panko the next time I make it. I made this dressing using ingredients I had, which is what I think you should always do! It's much more simple and fun when you experiment with what you have available. 


Enjoy this dish and Happy New Year!

Thursday, July 28, 2011

What a Wonderful World.


So I couldn't think of a clever title, so since good ol' Louis was playing in the background, I decided he was appropriate enough. I have made quite a few recipes since my last post, but my computer is in an out of commission on a daily basis, so I haven't found the time where it decided to work to post any. What a wonderful world.

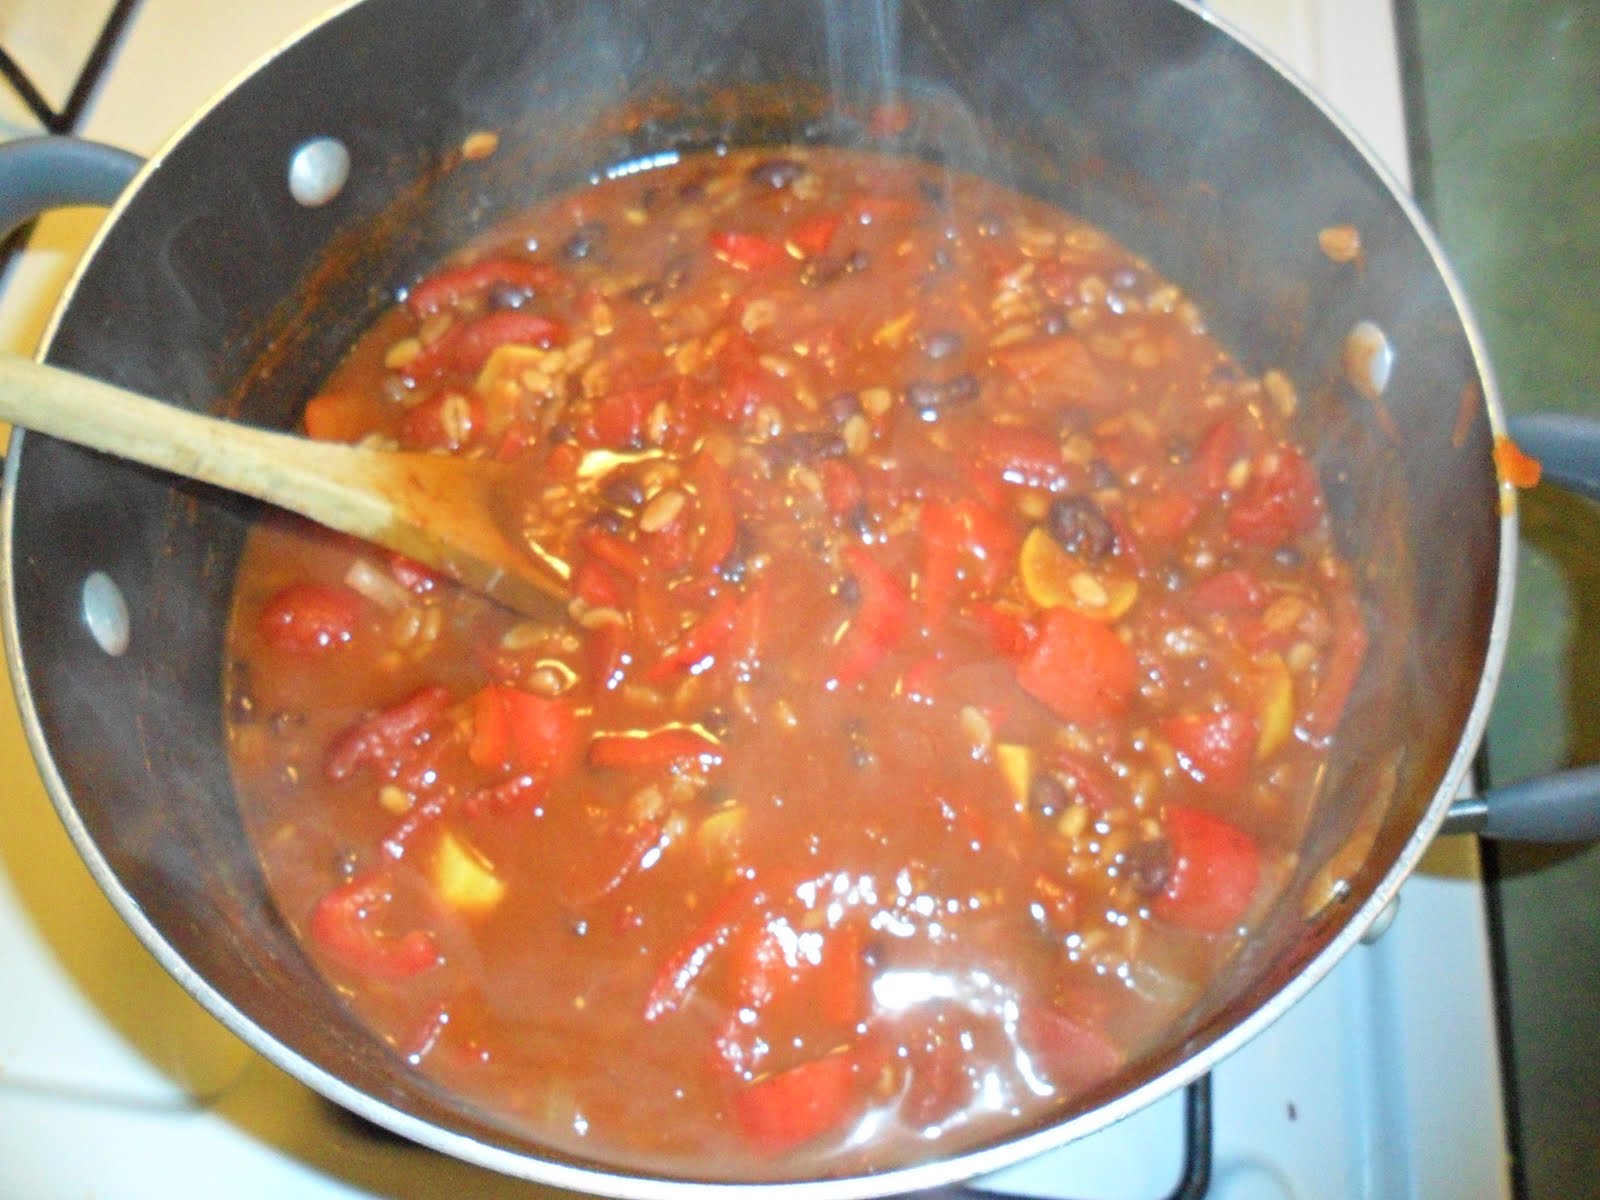
Here's the recipe for the Black Bean and Barley Chili I threw together, appropriately named "Black N' Barley Chili". I thought it was a little salty for my tastes, but others thought it was delicious as is. If you are not one for a lot of salt, I would suggest buying low sodium tomato juice, or replacing half with water. Also, you could buy no salt added beans or diced tomatoes to cut the salt back as well.


Black N' Barley Chili - Serves 9 (1 cup per serving)
Ingredients:
2 medium red bell peppers, chopped
2 cloves garlic, minced
1 yellow onion, chopped
1 summer squash, chopped (you could swap an ear of corn, or any other veggie you have)
1 1/2 cups black beans, drained and rinsed
1 cup quick-cooking barley
1 28 oz can of diced tomatoes
1 1/2 cups Tomato juice
2 cups water
1 Tablespoon canola oil
1 Tablespoon ground cumin
2 Tablespoon chili powder
1 Tablespoon Paprika
1/2 teaspoon cayenne pepper
1 teaspoon dried oregano
1/2 teaspoon ground pepper

First off, you wanna chop all your veggies. I highly suggest getting all the ingredients ready to go before you start cooking. It makes the process and clean up MUCH easier and faster. So while you're at it, open up the beans, drain and rinse, open up the tomatoes, and measure out the barley

Heat the oil in a large stock pot over medium heat, then add the veggies. Add the spices, and stir together. If I were to make this again, I would add more cayenne, since it wasn't hot enough for my tastes. That's another thing, taste, taste, taste! Taste as you go, and adjust the flavor according to what YOU like. I always think recipes are guidelines, where you get to fill it in or take out what you don't like. PLEASE experiment and tell me about it! This is how new and delicious recipes are formed. Anyway, back tom cooking. Cook until the veggies start to soften. I found it took about 5 minutes.

Next, add the can of tomatoes, and tomato juice.
Then, add the barley, and bring the mixture to a boil over high heat. Once it starts to boil, reduce to a simmer, and cook for about 10 minutes, or barley is tender. I added barley to replace ground beef, to make it vegetarian as well as adding some heart healthy grains! It makes the chili more hearty and filling as opposed to just adding beans,
Now you can add the beans. I wait to add them so they don't turn into mush, since they are already pretty soft. Feel free to add more beans, I only had black beans on hand, but kidney or red beans make for a great chili as well. As far as cooking goes you're about done! I found that the barley soaked up a lot of the tomato juice during cooking, so i opted to add additional water. If you like a thick, hearty chili, you could probably go without it, but it all depends on your likes.
Now just simmer until ready to serve, or transfer to a serving dish and store. I did make some healthy cornbread muffins to accompany the chili, since I find it hard to eat chili any other way, but I was not satisfied with the results, so I decided not to post the recipe, but one day I will find one to meet my standards!

I hope you enjoy, and as always experiment. I know summer isn't exactly the setting for a hot bowl of chili, but I'll find any excuse to eat chili! Each serving has about 150 calories, and not sure how much, but since the only fat added is a tablespoon of oil, I can assure it is low in fat. I kinda wish I had more chili now, but it didn't last long in my house.

What's your favorite thing to have with chili?

Tuesday, May 24, 2011

Pizza Perfection.


In the words of my Mother, "this is seriously, the best pizza I've ever eaten." With that being said, homemade pizza is more work, but also more delicious than your average take out pie. It's not the actual hands on work that's the killer, but rather the wait. It takes at least 2 1/2 hours from start to finish, but most of the time is dedicated to letting the dough rise. I got the recipe for the dough from allrecipes.com, (http://allrecipes.com/Recipe/amazing-whole-wheat-pizza-crust/Detail.aspx), but made a couple slight changes. As far as toppings go, I would go with what you have in the fridge which is what I did. As long as you have some veggies, cheese, and sauce, you can top a pizza.

Here is what you will need in order to make the dough. It's uses whole wheat flour as well as all purpose, so it is also a bit healthier than its' take out  counterparts. It also is enough dough to make two pizzas, unless you like a REALLY thick crust. I made 2 pizzas, and the crusts were still pretty thick.


Homemade Whole Wheat Pizza Dough:
1 teaspoon honey
1 1/2 cups warm water
1 Tablespoon active dry yeast
I Tablespoon Canola Oil
1 teaspoon salt
2 cups Whole-Wheat Flour
1 cup All-Purpose Flour

Equipment:
2 Large Bowls
Measuring Cups
Measuring Spoons
Dish Towel


First you want to add the water and the honey to one of the bowls. I used honey instead of white sugar, since I try to use as little refined sugar as I can, but that's my preference. Whatever sweetener you have/use will be fine. Stir to dissolve the honey. Then sprinkle the yeast into the water, and let sit for 10 minutes, until it turns foamy. If it doesn't foam, you're yeast is dead. :(


While the yeast is activating, I got the next set of ingredients together. I mixed the salt and oil together in a small bowl and set it aside.
Next, I measured out both of the flours, and set them aside. I use a flexible cutting board for the flour, so when you scrape off the excess flour from the top of the cup, it is easier to just bend the cutting board, and pour the flour back in the bag.
I also took the other bowl, and sprayed it with non-stick cooking spray. If you don't have any spray, brushing the bowl with oil will works as well.

Once the yeast is activated, add the oil mixture and stir. Then add the flours and stir until a dough starts to form. The dough will still be sticky, but don't worry we'll fix that in the next step.

Once you have a dough formed, turn it out onto a generously floured surface. This is when it starts to get messy. Be warned that the majority of your kitchen will be covered in flour when you're finished. But it's so worth it!
You now want to flour your hands as knead the dough, making sure all the flour gets incorporated. Continue knead for about 10 minutes, until the dough is smooth. Don't be afraid to add more flour to your board, and your hands to prevent the dough from sticking. Sorry there's no picture for this part, it was a bit messy, but here is what your dough should look like after all the kneading. If you have a stand mixer, feel free to use it instead of kneading. It should take the same amount of time, I just like to get a little arm work in. And I feel more accomplished knowing I put all the effort in.
Now put the dough into your greased bowl, and cover with a damp towel to prevent it from drying out. Put it in a warm spot for about an hour, until the dough has doubled in size. Now if your house is rather chilly, I have preheated my oven to the lowest setting for about 5 minutes then shut it off, and let my dough rise in there. Just make sure its not too hot, or else it will kill the yeast, so only preheat for a few minutes on the lowest setting.
If you have some chores to do around the house/yard, now is the time to do it. Believe me, if you're not occupied you will be tempted to keep peeking at the dough to see if it has changed yet, and that hour goes by SLOWLY.
Once your dough has doubled in size, cut it in half, and roll the two halves into balls. It's time to repeat the waiting game. Add the dough back to your bowl, cover, and let rise for another 45 minutes. This is why it takes so long! But remember, it's worth it!
In the last twenty minutes of the rise, I start to prep the toppings for my pizza. I didn't take a picture of this part, but again use whatever you have on hand, or that you want on your pizza. Like I always say, be creative! If you need some inspiration, my toppings consisted of :

-leftover pasta sauce
-crumbled feta & goat cheese
-minced garlic
-spinach
-sliced cherry tomatoes
-chopped red pepper
-chopped onion
-fresh basil leaves

You can also preheat your oven to 425 at this point. I had some disposable pizza pans on hand, but any baking sheet will work. Just spray them with cooking spray, or brush with oil.

Once your dough has doubled again, take one ball of dough, and roll it out on a floured surface. Then put it on your baking sheet, and stretch to fit. Repeat for the second ball of dough.

Add your toppings, and bake for 16-20 minutes, or until the cheese has melted, and crust is browned.


Voila! You have just made your own Pizza! Give yourself a pat on the back, but not before you dive into your perfect pie. You deserve a slice straight from the oven for all that work.

I hope you enjoy the process of making your own pizza dough. A lot of the store bought doughs contain trans fat, so making your own is always healthier. If you have the time to do so, I suggest making it from scratch. It also allows you to control what to put on, and can be much cheaper than take-out. Just like many other of your ( and mostly my) favorite indulgences can be sinfully nutritious!